How to Connect DSLR to TV
DSLR cameras have opened up the possibility for just about anyone to create professional-looking videos and photos for a fraction of the cost. DSLRs offer better resolution, clarity, and sharpness because they use a large sensor to capture the image and a powerful processor. They’ve become the go-to choice for most people starting a YouTube channel, becoming a vlogger, and beginning in photography.
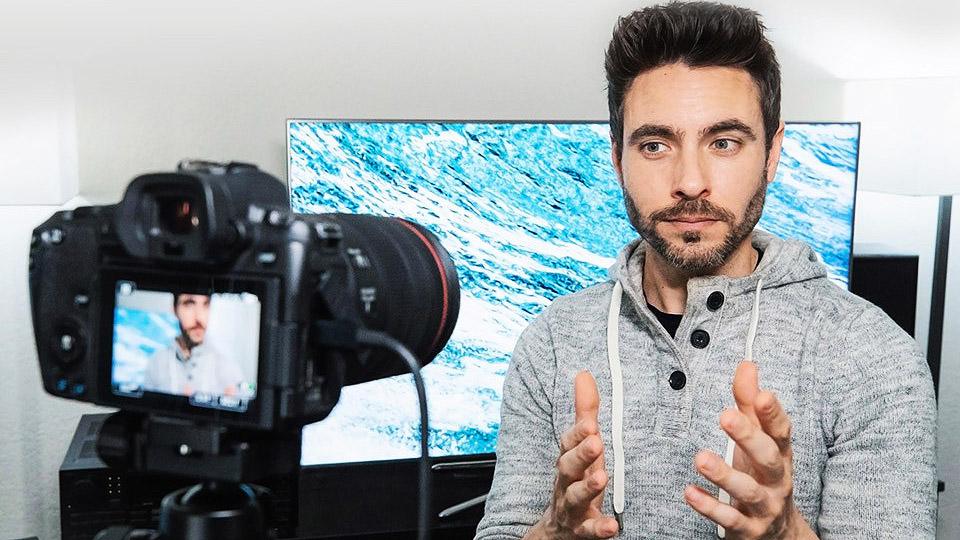
However, if you’re creating content on your own, the camera’s small LCD screen can make it difficult to see what you’re doing. Your setup could be out of focus, need more lighting, or have an unflattering viewing angle without you even realizing it.
TVs are an excellent solution if you need a makeshift field monitor larger than your camera’s display. This article explains how to connect your DSLR camera to a TV in a few simple steps.
How to Connect DSLR to TV
Using an HDMI cable, you can connect a DSLR camera to an HDTV and enhance your viewing experience. The location of the camera’s HDMI terminal may differ according to the model. In most cases, the HDMI Out terminal is located on the side of the camera and requires a Mini HDMI to HDMI Cable.
For older cameras, you may need a Micro HDMI Male to HDMI Female Cable Adapter along with an HMDI cable to make the connection work. If you’re not sure which HDMI cable to use, I recommend doing a quick Google search for your camera model or referring to your camera’s instruction manual.
The actual process may vary depending on the make and model of your camera and HDTV. However, most of the below steps should still apply.
- Turn off the camera and the TV.
- Insert the HDMI cable into the camera’s HDMI OUT terminal.
- Plug in the other end of the HDMI cable into your TV’s HDMI Input terminal.
- Turn on the TV and change the video input/source to HDMI.
- Turn on the camera to see it display on the TV.
The camera’s LCD screen will turn off after connecting to the TV. After viewing, turn off the camera and TV, and unplug the HDMI Cable.
How to Connect DSLR to TV Using Wi-Fi
If you have a Smart TV connected to your local area network (LAN) and it carries the DLNA (Digital Living Network Alliance) specification, you can connect a DSLR camera to the device for wireless playback. The camera acts as a digital media server, and the Smart TV acts as a digital media player. From the Smart TV, you can effortlessly search for photos and recordings in the camera and play them back.
Depending on the make and model of your DSLR and Smart TV, the actual steps may differ. However, most of the steps should still apply.
- Connect the Smart TV to your local area network (LAN).
- Open the Setting on the camera.
- Make sure Wi-Fi is enabled.
- In the Wi-Fi Function menu of the camera, select View images on DLNA Devices.
- To connect to a local area network, follow the on-screen instructions.
- Change your TV’s input to the source that displays your camera’s model number.
- When finished with playback, select Exit on the camera, then OK to close the connection.
How to Connect DSLR to Non-HD TV
Using the supplied Stereo AV cable, you can connect a DSLR camera to a Non-HD TV to view images and videos you have shot. The location of the camera’s AV Out terminal may differ according to the model. The terminal is typically located on the side of the camera.
- Turn off the camera and the TV.
- Connect the Stereo AV Cable bundled with the camera to the camera’s A/V OUT / DIGITAL terminal.
- Plug the other ends of the Stereo AV Cable into the Video In and Audio In jacks on the TV.
- Plug the yellow terminal of the Stereo AV Cable into the Video In (Yellow) jack on the TV.
- Plug the white terminal of the Stereo AV Cable into the Audio In (Left) (White) jack on the TV.
- Plug the red terminal of the Stereo AV Cable into the Audio In (Right) (Red) jack on the TV.
- Turn on the TV and change the input/source to video mode.
- To turn on the camera, press the playback button.
The camera’s LCD screen will go black when the photo or video appears on the TV screen. After viewing, turn off the camera and TV, and unplug the Stereo AV cable.
How to Connect DSLR to Monitor
If your computer monitor has VGA input, you’ll need a Mini HDMI to VGA adapter to connect your DSLR camera. If your monitor has an HDMI input, you’ll need a Mini HDMI to HDMI Cable. An older camera may require a Micro HDMI Male to HDMI Female Cable Adapter and a regular HMDI cable, depending on the make of your camera. Check the manual that came with your camera to determine if the camera’s output is Mini or Micro HMDI.
Here’s how to connect a DSLR to a monitor using the Mini HDMI to VGA adapter.
- Turn off the camera and the monitor.
- Connect a VGA cable to the monitor.
- Connect the VGA cable to the Mini HDMI to VGA adapter.
- Connect the other end of the Mini HDMI to VGA adapter to the DSLR camera’s HDMI OUT.
- Turn on the monitor.
- To turn on the camera, press the playback button.
What Is a Field Monitor?
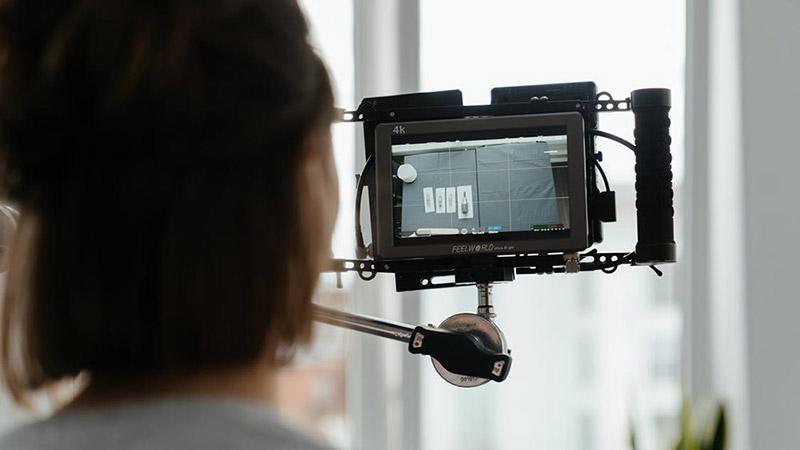
A field monitor is an external camera screen that shows you exactly what will appear in the viewfinder. They connect to your camera’s HDMI port and can be mounted on top of it or on a separate stand. They are available in many sizes.
The most common display sizes are 5 and 7 inches, but 10 and bigger monitors are also available. In terms of quality, you can get HD monitors, which are very common, and 4k monitors on the more expensive screens. You can get a monitor that supports LUTs to see how the raw image will look once it’s been processed.
Why Do You Need a Field Monitor?
Since camera displays are small, catching problems in-frame is more challenging. An external field monitor makes it easier to compose shots and keep them in focus. External monitors have far brighter screens than on-camera monitors, allowing you to see a clearer image. A bright screen can also help with glare when shooting outside on a sunny day.
Benefits of Field Monitor
- Field monitors are larger and more accurately represent the image and video you’re shooting.
- Easier to compose shots and keep in focus.
- Brighter than a digital camera’s LCD screen.
- They reduce glare when shooting outside.
- Some have the ability to zoom in and expand images.
- Support for LUTs, aspect ratio guides, waveforms, and HDR.
- Full HD with 4K support is available.
Shooting Styles
External monitors also allow for a broader range of shooting styles in your project. They can be immediately attached to video cameras to provide the operator with a better feel of image quality. Instead of gathering around the camera display, external monitors allow you to watch the footage from a wider range of locations. Instead of sitting close to the camera when shooting outside, you can sit with other crew members and watch the footage on a monitor stand.
Shooting Interviews
When shooting an interview, an external monitor can be handy because it’s tough to keep an eye on both the subject of the discussion and the monitor simultaneously. You can place an external monitor slightly out of frame to see the person you’re interviewing to ensure you’re both properly framed, lit, and in focus.
GadgetAudio.com is reader supported. We may earn a small commission from affiliate links in this article. As an Amazon Associate, we earn from qualifying purchases. Learn more.